
How to make a lampshade with fabric easy diy tutorial
For our latest crafty make, we head to Salisbury and join Louise Maidment from Lolly & Boo on a lampshade making course, where we learn how to make a lampshade in just a few hours on this fun and inspiring workshop. Hope you enjoy this diy lampshade tutorial – it’s to make a drum lamp shade which is a simple technique.

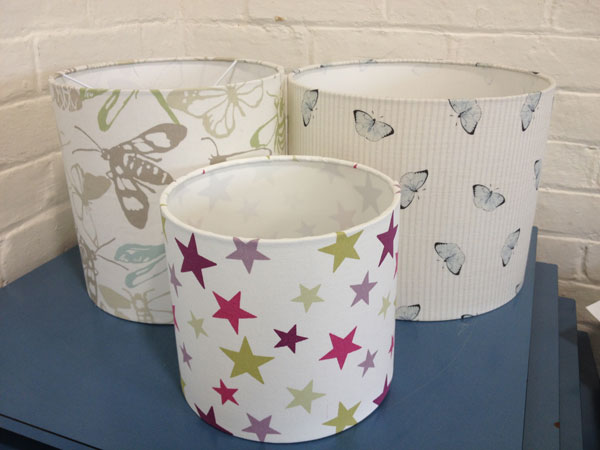
After a scenic drive past Stonehenge and along winding country lanes, I arrive at the pretty village hall in Stratford Sub Castle where Louise Maidment, founder of homewares brand Lolly & Boo, was setting up for the day’s lampshade making class. Fabric shades in all different shapes and sizes sat on shelves. A plain lampshade for a table lamp caught my eye first thing.


On the table nearby were several examples of pretty fabric lampshades that she had made in advance to demonstrate the different frame sizes available and how the scale of the fabric print looks on different sized shades.
How to make a lampshade – diy step by steps
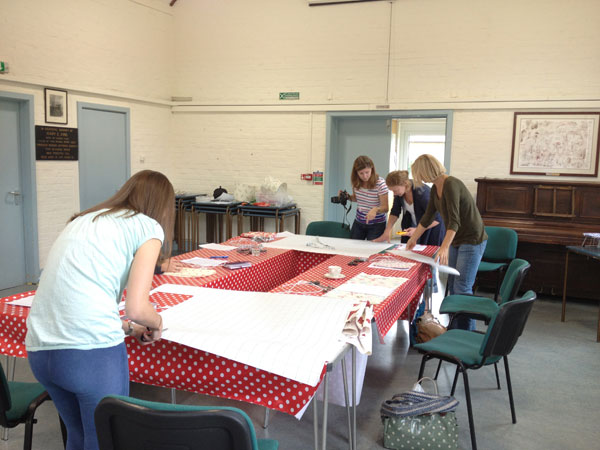
Louise likes to keep the classes small with a maximum of 8 people so that she can give each person as much individual attention as they need. On this occasion there were six of us eager to learn how to make our own fabric lampshade.
How to make a lampshade: what you need
First of all Louise introduced us to the materials we would be using: a metal lampshade ring set (which includes the top ring and bottom ring), fire retardant PVC lining, double sided lampshade tape (or hot glue gun if you prefer). A lampshade kit can contain teh rings, lining and tape. And of course we needed our own choice of fabric. You need enough fabric to comfortably run around the drum size you go for, allowing enough for glueing along the top and bottom edges as well as a little excess fabric to allow for the join.
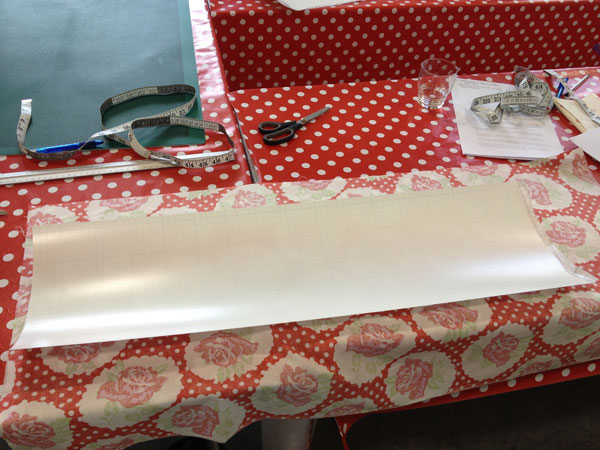
The first job was to cut out our fabric piece to the correct dimensions for the size of shade we’d be making. I chose a 25cm diameter shade and decided to make it with a lamp base fitting. Then it was time to give it a good iron to get rid of any fold lines or wrinkles which might show up on the finished shade.

Attaching the lining
Louise demonstrated how to attach the fabric to the PVC lining material, which is what makes the lampshade fireproof and allows it to confirm to the Lighting Association’s glow wire safety test.
She also gave us some handy tips about where to source lampshade making supplies and shared some of her favourite fabric companies such as fabric brand Peony & Sage whose beautiful linen prints are all made here in the UK. I asked if it’s possible to re-cover an old lampshade and Louise said it would be easy to cover over the existing fabric if it’s plain by running around fabric strips to create a lampshade panel attached with fabric glue. An idea to bear in mind, particularly as I have an old shade at home I’m thinking of covering with some extra fabric left over from some curtains I’ve just made. Thrift stores or charity shops would be a good place to source old lampshades cheaply if you fancy having a go at recovering them.
Taping the ends
Once the PVC backing material had been secured to the fabric, we were shown how to tape the end seam using specialist double sided lampshade tape.
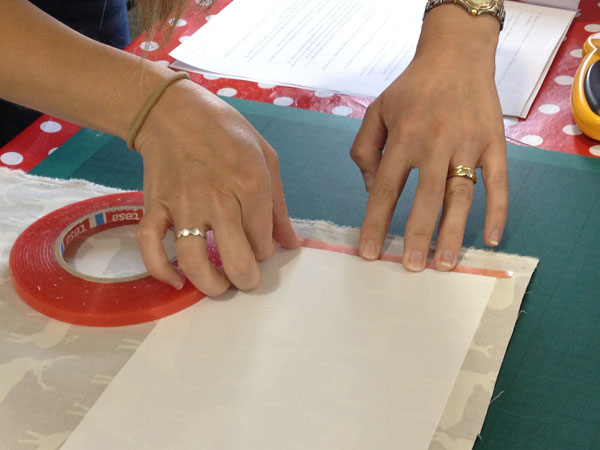
This essential step ensures a smooth clean seam and a gives a professional look to the finished shade. With the end seam folded and smoothed down, the next job was to tape the remaining sides of the fabric.

Attaching the metal ring frame
This requires some concentration and a steady hand to ensure that the tape is placed as close to the straight edge of the PVC as possible.
Another line of narrower tape was then added on top of the PVC which attaches the lining to the metal ring frame. Then it was time to start rolling!

Louise showed us how to hold a metal lampshade ring in each hand (one at the top of the shade and one at the bottom) while carefully rolling them simultaneously along the edges of the PVC, taking care to follow the line of the sticky tape and to move both rings forward at the same speed.
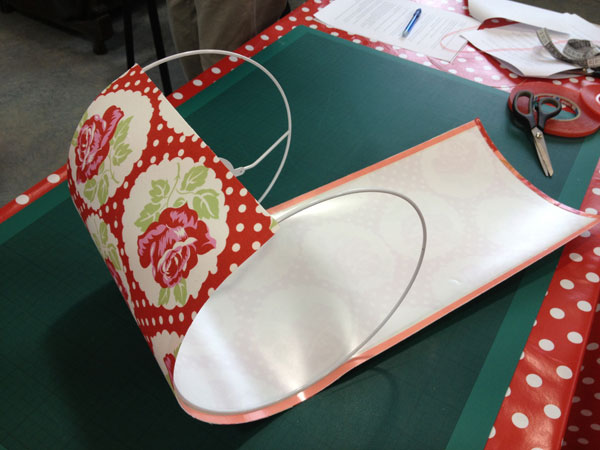
The rolling part is quite tricky at first, but the payoff is that your lampshade suddenly becomes three dimensional. It springs to life before your eyes, which is very exciting. It’s obvious, but I wasn’t the only one who had to turn the fabric the right way round so the patterned fabric wasn’t facing inside of the shade as I rolled!

Tucking in the fabric edges
The final task is to tuck the edge of the fabric over the metal rings and secure in place. If you want to add pom poms to the edge, stick along the inside edge at bottom rim of the shade (either with a line of glue or a strip of double-sided tape). This is a good way to create a pretty finish at the bottom of the lampshade and is a top tip for getting a professional finish. Bias tape is another trim idea that we were shown – just attach in straight line with a little glue, or tape, along the top of the lampshade or top and bottom. The way you choose your own lampshade is up to you – that’s the creative part.
Then it was time to stand back and admire our handiwork. What was previously a flat piece of fabric had been miraculously transformed into a professional looking drum lampshade. The size of your lampshade is obviously dictated by the size of the rings you use and the width of the lining and strip of fabric you use. What I love about Louise’s technique is that there’s no need for a sewing machine and it can be used to make bigger shades too. It’s a great project for adding a fresh new look to your home for not very much at all.

Finished!
This shade was created to stand on a lamp base so the fitting is at the bottom. Most shade ring sets can be adapted either for a ceiling pendant or a lamp base fitting. Take a look at the resources section below for information on where to source lampshade making supplies. I like a soft light bulb too, but that’s obviously a matter of personal preference.

Back home I attached my lovely new shade to a vintage glass lamp base and in my young son’s bedroom. I can’t tell you how proud I felt! What is fantastic about this short 3 hour course is that you get to see results really quickly. We all took home a professional looking finished product at the end of the day. As easy ways to freshen home decor go, this is a really great way to do just that.
More ideas
I have some old fabric I’d like to have a go with too – for my living room this time – and I’m thinking of making a couple in different sizes for an eclectic/vintage look. This was the first lampshade I’ve ever made and it was so much easier than I thought. There’s a different method I might try out too: It’s a free tutorial on youtube by Rosi de Ruig for House and Garden and is a variation on this technique, using paper. Rosi makes a beautiful collection of bespoke shades using original marbled, recyled and reproduction papers.
How to make a lampshade: video tutorials
Louise was a wonderfully calm and patient tutor and it’s clear that she has a real passion for fabric, which is evident in her own collection of Lolly & Boo handmade lampshades, which feature beautiful linens and gorgeous children’s prints.
If you prefer idea of making new lampshades of your own using a needle and thread rather than glue, this tutorial might be useful:
It teaches viewers how to use lampshade stitch, a crucial technique for securing fabric to a lampshade frame. The instructor demonstrates the stitch step-by-step, emphasizing the importance of catching all layers of fabric and using a strong thread. The video also highlights the versatility of lampshade stitch, showcasing its use in various lampshade designs.
To have a go at making a DIY pleated lampshade, how about this no sew tutorial by Stone Cottage Home which takes you through an easy technique for creating a professional looking pleated lampshade step by step. There are also super helpful tips and advice about fabric and trim choices, and I love their suggestion of using this block printed voile
How to make a lampshade: fabric choices
Talking of fabric choices, there are lots of patterns that would work for this project. But I’m loving lots of block printed fabrics I’m seeing on Etsy. If I had to pick just one or two, I guess I’d go for this Mughal print. Or how about this totally gorgeous Poppy hand-printed fabric in peachy shades with accents of red and green. My final pick would be this embroidered cotton / linen fabric with a beautiful flowers and botanical design.
It’s available in either black or white background, so you could create totally different lighting moods depending on which you go for. The black colourway would feel moody and atmospheric, whilst the white fabric would be light and pretty. Either would be gorgeous don’t you think?
INFORMATION
This article contains affiliate links, which means we may earn a small commission if a reader clicks through and makes a purchase. All our blog posts are independent and in no way influenced by any advertiser or commercial initiative. Also as an Amazon Associate, I earn from qualifying purchases. By clicking on an affiliate link, you accept that third-party cookies will be set. Discover more about our privacy policy on our website.
If you would like to join our mailing list, simply fill your email address into the pop up box at the top of this page.
Feeling inspired? Take a look at the Creative Workshops category in our Directory.
You might also like:
A pin to share to Pinterest


Leave a Reply